How to Transfer Project Data in GT Designer3 for Mitsubishi GOT HMI
Transferring project data is a critical process in managing Mitsubishi GOT HMI systems. It enables users to move designs, settings, and configurations from GT Designer3 to the actual HMI units or between different project files. This guide outlines the steps necessary to transfer project data effectively, ensuring a smooth and efficient workflow when deploying applications in industrial environments.

-
01 Your First GOT – Introduction to Mitsubishi HMI Training

Your First GOT – Introduction to Mitsubishi HMI Training Human-Machine Interfaces (HMIs) are essential components in industrial automation, providing a…
-
02 Using the GOT – GOT appearances

Using the GOT – Customizing GOT Appearances for Optimal Usability The appearance of Mitsubishi’s GOT (Graphic Operation Terminal) HMIs is…
-
03 Using the GOT – How the GOT functions
Using the GOT – How the GOT Functions in Industrial Automation The Mitsubishi GOT (Graphic Operation Terminal) is a versatile…
-
04 Screen Design Software – System Setting of GT Designer3

Screen Design Software – System Setting of GT Designer3: Configuring Your Mitsubishi HMI for Optimal Performance GT Designer3 is Mitsubishi…
-
05 Screen Design Software – Screen Layout of GT Designer3
Screen Design Software – Screen Layout of GT Designer3: Building User-Friendly HMIs for Mitsubishi GOT Creating an efficient screen layout…
-
06 Mitsubishi GOT – Creating Projects
Creating Projects – How to Create Switches in GT Designer3 for Mitsubishi GOT HMI Switches are essential components in Mitsubishi…
-
07 GT Designer3 – Creating Projects
How to Create Lamps and Save Projects in GT Designer3 for Mitsubishi GOT HMI Indicator lamps are critical in Human-Machine…
-
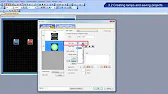
08 GT Designer3 – Transferring project data
How to Transfer Project Data in GT Designer3 for Mitsubishi GOT HMI Transferring project data is a critical process in…
-
09 GT Designer3 – Connecting the GOT to the PLC
How to Connec the GOT to the PLC in GT Designer3 Connect the Mitsubishi GOT (Graphical Operation Terminal) to a…
-
10 GOT Maintenance – Necessity of maintenance

GOT Maintenance – Understanding the Necessity of Maintenance for Mitsubishi GOT HMIs Maintaining Mitsubishi GOT (Graphical Operation Terminal) HMIs is…
-
11 Mitsubishi GOT – Backing up the GOT data
Mitsubishi GOT – Backing Up the GOT Data for Mitsubishi HMIs Backing up data from Mitsubishi GOT (Graphical Operation Terminal)…
-
12 Mitsubishi GOT Maintenance – Addressing of alarms

Mitsubishi GOT Maintenance – Addressing Alarms in Mitsubishi HMIs Addressing alarms effectively in Mitsubishi GOT (Graphical Operation Terminal) HMIs is…
-
13 GOT Maintenance – Replacement of a battery
GOT Maintenance – Replacing the Battery in Mitsubishi HMIs Replacing the battery in Mitsubishi GOT (Graphical Operation Terminal) HMIs is…
-
14 Mitsubishi GOT – Ending
Mitsubishi GOT – Course Conclusion Congratulations on completing the “Your First GOT” course! Throughout this journey, you’ve gained essential knowledge…
The Importance of Data Transfer in Mitsubishi GOT Projects
Transferring project data ensures that the designs and configurations created in GT Designer3 are accurately reflected in the physical devices. This step is essential for maintaining consistency across various machines, updating firmware, and implementing changes without losing critical data. Efficient data transfer minimizes downtime and enhances the reliability of operations.
Common Scenarios for Data Transfer:
- Deployment to HMI Units: Moving a completed project from GT Designer3 to Mitsubishi GOT HMI devices for real-world application.
- Backup and Recovery: Creating copies of projects for backup purposes or recovering previous versions.
- Inter-project Transfer: Moving elements between different projects within GT Designer3 for reuse or adaptation.
Step 1: Preparing Your Project for Transfer in GT Designer3
Before transferring project data, ensure that your project is ready and correctly configured.
Review Project Components
- Finalize Design: Make sure all screens, lamps, switches, and settings are correctly configured and tested within the simulation mode.
- Check Connections: Verify that all PLC and device addresses are appropriately linked to avoid connectivity issues during deployment.
- Save Changes: Ensure that all recent changes are saved by clicking “File” > “Save” in GT Designer3.
Step 2: Selecting the Transfer Method
There are various methods available for transferring project data to HMI units, depending on your setup and requirements.
Common Transfer Methods
- USB Transfer: Use a USB flash drive to transfer project files directly to the HMI unit.
- Network Transfer: If the HMI unit is connected to a network, transfer files over Ethernet using GT Designer3’s built-in capabilities.
- Direct Connection: Connect the HMI device directly to the PC via a serial or USB connection to facilitate direct data transfer.
Step 3: Transferring Project Data from GT Designer3 via USB
Using a USB drive is one of the most straightforward methods for transferring project data.
Steps to Transfer Using USB
- Export the Project:
- Open GT Designer3 and navigate to “File” > “Export.”
- Choose the project you wish to transfer and select the export format compatible with the HMI.
- Save the project file to your local system.
- Copy to USB Drive:
- Insert your USB drive into the PC.
- Locate the exported project file and copy it to the USB drive.
- Safely eject the USB drive after the transfer is complete.
- Import on HMI Unit:
- Insert the USB drive into the Mitsubishi GOT HMI unit.
- Navigate to the file management or project import section on the HMI interface.
- Select the project file from the USB drive and follow the prompts to complete the import process.
Step 4: Transferring Project Data via Network
Steps for Network Transfer
- Configure Network Settings: Ensure the HMI unit is connected to the network and has the correct IP settings configured.
- Open Transfer Dialog:
- In GT Designer3, navigate to “Transfer” > “Project Transfer” to open the transfer dialog.
- Select Destination:
- Input the HMI unit’s IP address and select the project you wish to transfer.
- Initiate Transfer:
- Click “Send” to begin the data transfer. Monitor the progress on both the PC and the HMI unit to confirm successful completion.
Step 5: Verifying Successful Transfer in GT Designer3
Steps for Verification
- Open the Project on HMI: Launch the project on the Mitsubishi GOT HMI unit and navigate through the screens to check for accuracy.
- Test Functionality: Interact with the switches, lamps, and other components to ensure they function as intended.
- Check PLC Connections: Monitor the HMI’s connection to the PLC to verify that data is correctly being sent and received.
Practical Applications of Data Transfer in Industry
Transferring project data is integral to various industrial operations, ensuring efficient deployment and updates for Mitsubishi GOT HMIs.
- Manufacturing: Quick deployment of updated HMI interfaces across multiple machines to enhance productivity.
- Maintenance and Troubleshooting: Rapidly transfer backup projects to restore settings or troubleshoot issues on-site.
- Scaling Operations: Easily replicate and transfer projects to new HMI units as production lines or systems expand.
FAQs
How do I export a project in GT Designer3?
Navigate to “File” > “Export,” select the project, and choose the appropriate format for your transfer method.
What should I do if the transfer fails?
Check the connection settings, verify that the project file is not corrupted, and ensure that you have the correct permissions on the HMI unit.
How can I ensure that my project is ready for transfer?
Review all components, check for errors in the simulation mode, and save all changes before initiating the transfer process.
Conclusion
Transferring project data in GT Designer3 is essential for implementing Mitsubishi GOT HMI applications effectively. By following the outlined steps for preparation, transfer methods, and verification, users can ensure a smooth transition of their project designs to physical HMI units. Proper data transfer practices enhance operational efficiency, facilitate timely updates, and maintain consistency across industrial applications.
